Tuesday, August 30, 2016

Dining Room Chandelier Makeover

Hello there! I've been thinking of painting my dining room chandelier for a long time and finally made it happen the other day. 

Here's how it looked before...


And here it is now...


I love how the darker medallion really stands out against the ceiling.

I just love it! All I did was remove the cord cover and shades, then I spray painted the entire thing (chain and all) with Rustoleum Heirloom White. I also spray painted the ceiling medallion Satin Granite, and added clear round bulbs. 

Here's a side by side comparison...


I love the updated version!

Here's the paint I used...


And here are the bulbs I got from Home Depot...


I should have done this years ago! The whole thing only cost me about $12. Not bad, huh? While I had the spray paint out, I did some touch ups on my kitchen barstools and chairs. It has been two years since I painted them (see that post HERE) and they've held up great. They're heavily used on a daily basis, so I was glad it took two years for them to need a touch up. Originally I was going to go for the "distressed look" when they started needing touch ups, but I decided to go ahead and paint them instead. 

Here's how one of them looked after two years of wear and tear...


And after a quick touch up...


Here's a full shot of the dining room with the new and improved chandy...


I was totally inspired by Sonya and her blog At Home With The Barkers. She did a wonderful makeover on her chandy and I knew I had to do the same. 

And in all fairness...I have to admit I was also inspired by the tv series American Gothic. Are y'all watching that? So good! Anyway, the whole reason I started watching it was because of the house in the promos. I simply had to watch to see more of that beautiful house. One of the first things I noticed was this big chandelier with those round bulbs in the main house...


Kinda blurry, but you get the picture. 
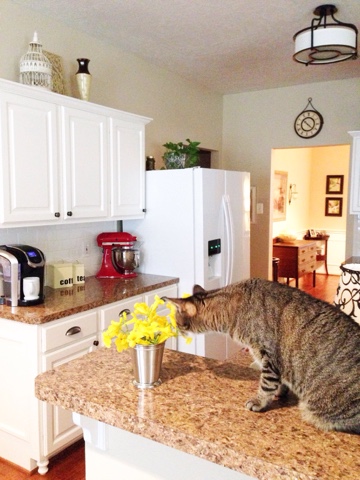


Just look at all the trim work in this house...


And this kitchen...


Look at this foyer!!! 


I'm always pausing this show to look (drool) at the house. :) 

That was the final push I needed to get started on this little project. Isn't it funny how shows can inspire us with their decor choices? And how fun would it be to be a set decorator? :)


~Lisa


Saturday, August 27, 2016

Adding a Back Up Camera to Your Car for $40

I recently mentioned how we added a back up camera to my son's car for about $40. His car didn't come with one and he really wanted to add it. I thought it was a good idea and a neat safety addition as well. 

I think it will be 2018 before all new vehicles (weighing less than 10,000 lbs) will be required to have back up cameras. I'm so glad they're doing this. It's about time. 

The one he chose came with a rear view mirror that clips on to the existing mirror and the backup camera was sold separately . It's kind of hard to explain, but the new clip on mirror looks and works just like a regular mirror, but when you put the car in reverse, the middle part of the mirror shows the view from the backup camera.

Here's the mirror we bought...


And the camera...


They do sell a wireless version, but at the last minute, we decided to get the wired one because with the wireless one, they would have to locate 2 more power sources to plug the transmitter into. Plus, we read that sometimes the wireless ones can have interference. 

Also, I think places like Best Buy will install these for you. 

I'm not going to go into details as to how they installed it, because every vehicle will be different, but basically they installed the camera at back of the vehicle, then ran the wires through the trunk, behind the driver's side door panels, and up to the mirror. The whole thing took around 3 hours.  

None of the wires are visible and it doesn't look any different than it did before. 

A few things to keep in mind...It really does work, but it's not nearly as good as the ones that come already installed on the cars. My older son's new truck has a back up camera and when in reverse, you can not only see behind you, but all the way down the street to the right and left. However, with this one from Amazon, you don't have as wide an angle. Still a good feature, just not as big a view.

Obviously you're going to get a much better picture with the ones that come already installed and show up on the LCD screens on the dash. As I said, this one shows up in the middle of the clip on mirror and when in reverse, the back up picture has a slight glare in the daytime. You can still see what's behind you, there's just a bit of a glare. It works great at night though. 

All in all, it was well worth the $40 for peace of mind. I would highly recommend, especially if you have little ones that play outside and around the garage or parking area. Or even pets, for that matter. Let me know if y'all have any questions and I'll do my best to answer. 

Thanks for stopping by!

Lisa


Thursday, August 25, 2016

Blueberry Muffin Recipe with Kolache Topping

I'm back today to share a blueberry muffin recipe with you. The recipe is from my Better Homes and Gardens cookbook, circa 1990. 

It's a plain muffin recipe with lots of variations listed where you can add extra ingredients for blueberry, cranberry, jelly, date-nut, cheese, banana, pumpkin, corn, or oatmeal muffins.

Here's a link to the Better Homes and Gardens muffin recipe:


I've used this recipe for years and usually make the blueberry version, which I'm sharing with you today. The only difference is I add my mom's kolache topping which makes a world of difference. 


I'm part Czech and grew up on kolaches. I could eat them on a daily basis. :) My mom made them all the time when I was little. 

My favorite part of the kolache was the topping she added. A true fruit kolache will have this sweet topping made from flour, sugar, and butter and this is what I add to my muffins. So without further adieu, here's the recipe...

Make the topping first and set aside.

Mom's Kolache Topping:

1/2 cup sugar
1/4 cup flour
2 tablespoons butter

Combine all three ingredients in a bowl using a pastry blender and set aside.


Better Homes and Gardens Blueberry Muffins:

1 3/4 cup flour
1/3 cup sugar
2 teaspoons baking powder
1/4 teaspoon salt
1 beaten egg
3/4 cup milk (I use 2%)
1/4 cup cooking oil (I use canola)
3/4 cup frozen blueberries (do not thaw)


In mixing bowl, combine flour, sugar, baking powder, and 1/4 teaspoon salt. Make a well in the center. Combine egg, milk, and oil and add all at once to flour mixture. Stir just until moistened and fold in frozen blueberries. Line muffin tins with paper baking cups and fill 2/3 full. Sprinkle slightly less than a tablespoon kolache topping on each muffin (I very lightly press the topping into the muffin a little)  Bake at 400 degrees for 20 minutes, or until golden. Yield: 10-12.

Here are a few pics from the last time I made these.

You can see my pastry blender in the background. This is the kolache topping...


The batter will be kind of thick...


Here they are awaiting their topping...


Yum! With the topping added, they're ready for the oven.


You can see the bits of butter in the topping. Oh so good!


And here is the finished product...


Lots of chunky blueberry goodness...


So good and so easy to make. 

Oh, and have y'all tried this Almond Water? I got it at HEB, but they sell it at lots of places and it was so good! This was my 150 calorie snack the other day...almond water and a Keebler birthday cake cookie. :) 


Thanks for stopping by!

~Lisa 


Monday, August 22, 2016

Garden Blooms August 2016

Happy Monday! I've been a little absent from the blog lately because my youngest son had his wisdom teeth out last week. Needless to say, I've been very busy taking care of him. My last week consisted of changing out gauze pads, ice packs, pain pills, antibiotics, and mouth rinses. Fun. Fun. Fun. Oh, and ice cream...lots and lots of ice cream...for him, not me. Ha! He was pretty much completely back to normal after a few days, thank goodness. Glad that's over with and now we start back to school this week, so hopefully I can get back to blogging more regularly. 

I took some garden pics that I was going to include in my pergola cover post, but that post got to be so long, I decided to give these a post of their own. 

August is probably the hottest month in the Houston area, but thankfully there are some show stoppers that continue to bloom, despite the heat. 

First up, I'd like to talk about this beauty, Angelonia...


I have it in white (above) and purple (below)


My goodness, this one deserves a gold star. I totally forgot I even had them out front and because of that, they went without water for probably weeks and we didn't have a lick of rain during that time either. But they still continued to bloom, bless their hearts. ;) 

Below are three white Angelonia plants in front of some miniature Bottle Brush bushes. You should see when the red Bottle Brush is in bloom behind the white Angelonia. It's so pretty! Gotta love something that can take the heat (and drought, apparently) and still thrive and bloom. 


Below you get a glimpse of another white Angelonia beside some orange and yellow Lantana. 


Here are some purple Vincas I planted in a pot on the patio. As you can see, some purple Gomphrena decided to make a reappearance in this pot as well. I haven't had Gomphrena in this pot for a long time, but I guess there were some seeds in there somewhere. 


I think they look really pretty together. 

It was really bright and sunny when I snapped this pic, but you can see the Moss Rose on the coffee table is still doing fine. 


The Vincas are a little stressed, but the Star Pentas are doing fine.


Just look at this pretty pink Penta...


Blue Plumbago always does well. This is two bushes planted close together and it blooms all summer long...


The yellow Esparanza had a slow start, but is blooming non stop now. 


More Lantana and white Angelonia... 


Of course, I had to include one of my Crepe Myrtle trees...


Now here's where the prettiness stops. At the beginning of the season, I bought three Turk's Cap plants. They are supposed to be great bloomers and are native to our area, so I had high hopes. 

Well, just look at them now...

Suspect #1


Suspect #2


Suspect#3


Oh my. None of them did very well and do you see how scraggly they are? I hate when a plant gets all tall and lanky and doesn't fill in like that. I decided to pull them up and replace them with some Angelonia.  

Here's another example of how two plants side by side can turn out very differently. Below you see two Lantana plants and they couldn't be more different...


The one on the left was in between blooming cycles when I took this pic.

They're different varieties and apparently the purple one on the right wasn't happy living here. This is just to remind you that gardening is an ongoing process. Sometimes things don't fit in with your landscape, get too big, or not big enough, don't bloom, or you're just not happy with them. If I'm not happy with a plant or flower, I always pull it up and start over. No sense in continuing to be dismayed every time you look at something.

That Lantana above also got replaced with some Angelonia. Houston Garden Center had them for $1, so I bought 15 and planted them all around my backyard. I'll try to share pics soon.


I have a couple of posts in the works like a blueberry muffin recipe with my mom's special kolache topping, and how we added a backup camera to my son's car for about $40. It's so neat!

What's blooming in your area? Are you still getting hot summer weather?

~Lisa


Friday, August 12, 2016

Mint Julep Cup Under $4 and This and That

This post is going to be all over the place with lots of little tidbits, so consider yourself warned. :) Remember when I told y'all about the Whoa Wait Walmart blog and instagram account? Well, I've been faithfully following them ever since and boy, have I gotten some sweet deals! Bethany and Amanda are the people behind the blog and they share lots of unadvertised deals at Walmart almost daily. I've gotten things like $5 tassel necklaces to $5 sunglasses, to this beautiful mint julep cup and I never would have known about any of it if not for their blog. 

Take a look at my new mint julep cup I scored at Walmart for only $3.76. I immediately filled it with some of my blue plumbago blooms. 


Here it is looking pretty with some yellow Esparanza blooms I clipped one morning.


When I saw it pop up on their feed, I HAD to have it. And I've had fun styling it all over my house. Here's a few snaps I shared on Instagram...

Holly checking out the new blooms...


Again with my little photo bomber...


So in other news, I've been wanting to try Bumble and Bumble Straight creme for a long time now. It's a straightening creme you apply to damp hair before blow drying and it's supposed to be a miracle worker for frizzy hair (like mine) The only thing holding me back was the price. It's about $32 for 5 ounces. But, I had some Amazon points, so I used those and only had to pay about $14.


I also ordered a paddle brush (something I've been meaning to do for a long time) I have long hair and keep hearing how good they are for tangles, etc. 

So, here's my verdict. The BB Straight was okay, but honestly, I'm just as happy with my old standby I've used for years...


I hate to say it, but this Suave straightening cream did just as well for me. Maybe it's the texture of my hair or something, but I didn't notice a difference between the two. So for now, I'm sticking with my $2.75 Suave product. The paddle brush however, was a hit! I am very happy with it and I think it was only around $6. 


Since this post is so random, I thought I'd share my new sunnies too. You can't beat a $5 pair of sunglasses at Walmart...


How cute are they? I love them!

My son had a 17th birthday party a couple of weeks ago and one of his friends not only brought him a gift, but one for Holly as well. It was a sweet gesture and let me show you how happy Holly is with her new things...


She loves the crinkly sound her new toys make. 

She's coming up on her 4th birthday, but still has A LOT of kitten left in her. Girl can chase a string or bat around a toy like nobody's business. ;) 

Okay, one last thing. Did y'all know you can order Subway sandwiches online and pick it up in the store? Maybe I've been living under a rock, but I just became privy to this last week. You see, we used to get Subway a lot for dinner, but then it became cumbersome with everyone wanting something entirely different with different toppings, breads, cheeses, etc. The poor soul who picked up dinner that night was stuck with a long and confusing list of orders. Not to mention that it's kind of hard to order four things at one time with usually two different people taking your order while you make your way down the line.

But fear no more...you can now place your order online, pay for it online as well, and then it's magically ready for you to pick up in less than 15 minutes! Oh happy day! Just go to their website HERE and click on "order online" in the upper right hand corner. 

It'll take you through your entire order, letting you click on everything you want to add to your sandwich. Then just enter your credit card info. and it'll be ready when you get there. It was so easy to have everyone build their own on the iPad, then just waltz into the store, grab the bag and go. No waiting in line or anything. You're in and out in seconds. The website also remembers what you order, so if you get the same thing all the time, you can just click on "order this again" and it'll automatically send your order to the store. I love it because I can get my favorite sandwich and it's only 280 calories. 

Y'all may remember me saying how I really don't cook much anymore so it's nice to finally have Subway back on the regular dinner rotation. 

I guess that's all I've got for now. Thanks for stopping by!


~Lisa


Related Posts Plugin for WordPress, Blogger...