Thursday, August 20, 2015

New Family Members...Twins! And a Day In Rosenberg, Tx.

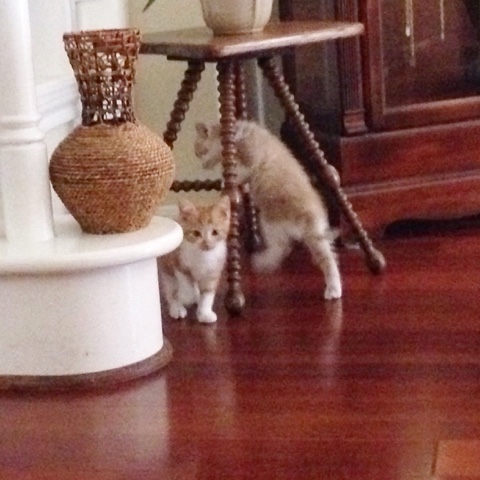
Hi there! I wanted to introduce you to our newest family members. My mom and stepdad adopted two sweet kittens! Twins, in fact. Just look at this adorable brother and sister! 


I made up a little birth announcement for them. :)

We couldn't wait to see them in person, so we made a last minute trip to visit my mom. 


Just look at little Trixie stretching below... 


See how tiny they are? That's Cecil below. And yes, he's named after the lion. :) 


These pics are kind of blurry because they move lightening fast. They definitely keep my mom on her toes! 


After we played with the kittens, we decided to travel to the very small town of Rosenberg, Tx. for lunch and some antique shopping. Rosenberg isn't very far from where my mom lives and is filled with fun little shops.

This is where we ate lunch. It's an old time soda fountain and was such a little gem of a place! 


Another Time Soda Fountain and Cafe is on the right and the Old Main St. Bakery is on the left of the pic above. 

Don't you love the ceiling in here? 


Most of us had milkshakes with our lunch. My boys had butterscotch and chocolate and my mom and I had creamsicle. Yum! When you order a milkshake, they pour it into that glass and also give you a little silver pitcher with the remainder of the milkshake. See the two creamsicle ones in front? That's ONE milkshake that my mom and I split. :)


Their fried chicken sandwich was divine!


We visited a few antique shops (I didn't get any pics) then made our way over to the bakery next to the soda fountain. 


So many delicious things to choose from...


Cupcakes...


Kolaches, brownies, cinnamon rolls, etc.


But this is the real reason we came...those apricot kolaches on the right! They are the BEST! My Czech heritage cannot resist a good kolache. :)


I thought this chocolate peanut butter cupcake looked so good and I'm regretting not getting one.


So, that was our day in Rosenberg, Tx. We had such a good time and I'm so glad we got to see my mom's kitties before they get too big. I call her every morning to check on the "twins" and hear the latest story of their shenanigans. She told me this morning they discovered their water bowl can double as a "pool" and they can splash water at each other. Lol! 

Y'all have a great day!

~Lisa 

Sunday, August 16, 2015

A Few More Favorites From the Loreal Infallible Line and Two Recipes

I recently shared some of my new favorite makeup from the Loreal Infallible line. You can see that post HERE

The Infallible makeup did so well in our heat and humidity, I wanted to try their eyeliner and lip color too and I wasn't disappointed! 

I bought the Infallible Pro Last Lip Color and the Infallible Never Fail Eyeliner


loreal infallible eyeliner

The lip color looks like this...


The lip color is on one end and the clear balm is on the other. You first apply the color, let it dry for two minutes, then apply the balm. They claim it lasts for 24 hours and I agree!!! I applied it early in the morning and I think I reapplied the clear balm a few times during the day, just to keep my lips moisturized. 

I ate three meals, sipped soda from a can (I know...SO ladylike, right? Hee hee!) drank coffee, etc. and it stayed on really well.

At the end of the day, I tried to wipe the color off and it didn't budge. I then tried to remove it with Vasaline, and again, it didn't move. So, I tried removing it with two different soaps in the shower and once more, it stayed put. The color dulled a bit, but was definitely still there. I finally gave up and went to bed. When I awoke in the morning, there was still a little color on my lips!

What I liked about it (besides the staying power) was that the color didn't transfer. It didn't come off on my coffee cup or on my pillow at night. Definitely a thumbs up from me! 

Next up, I tried the eyeliner...


Here's what the packaging looks like...


They claim it lasts 16 hours, and I have to agree. Keep in mind that's really saying something in our triple digit heat and humidity. :) I walked all around my son's college campus for two hours in extreme heat and it did just fine. The eyeliner didn't smudge or come off all day long, yet it still came off pretty easily with Vasaline at the end of the day. I'm making this Infallible line my summer (if not year round) makeup. Love it!

I recently mentioned that I was trying Tiffani Thiessen's recipe for a corn on the cob sauce made with sriracha, mayo, and a few other things. It was a hit! So, as promised, here's a link to the recipe:


It was way too hot to be outside grilling, so I just boiled the corn and I also skipped the cilantro. I love cilantro, but forgot to buy it at the store. :) 

Here's a pic of mine...


It was really good and I even added a little to my BBQ chicken that night. :)

Oh, and since I got a few requests for my BBQ chicken recipe, here it is...

*Five boneless, skinless chicken breasts (thawed)

*One red onion (sliced)

*One yellow onion (sliced)

*One bottle of your favorite BBQ sauce

*Garlic powder (to taste)

*Cumin (to taste)

Throw everything in the crock pot and cook on low for 8 hours. Then shred chicken and return to crock pot for 30 minutes. Serve on hamburger buns, ciabatta buns, or whatever you like. 


Y'all have a great day!

~Lisa 

Wednesday, August 12, 2015

Adding Decorative Panels To Cabinets

Hello! I'm finally sharing the little something we added to our kitchen cabinets. I originally got the idea from sweet Kris at Driven By Decor

I was just browsing her pretty blog one day and came across THIS post and fell in love with what she did. So, I very sweetly showed the pic to my hubby and asked if we could do the same in our kitchen. ;)

We simply added decorative wood panels to the sides of our kitchen cabinets. As it turns out, we already had all the supplies, so the cost of this project was zero. Love that!

Here'a a pretty "after" pic...


See the panels on the side? 

Here's the wood trim we used...


The trim was left over from when we framed out our windows. Here's a close up so you can see the details...


I painted them using the same paint we used on our cabinets (Ben Moore Advance in Simply White) then we nailed them up, caulked them and did a little touch up paint, and that was it! 

This collage below shows what the cabinet sides looked like BEFORE...


And here are a few pretty after shots...


On the cabinet side below, I almost added a small decorative towel bar to display some "too pretty to use" dish towels and seasonal dish towels, but I'm not sure if I want to do that now. 


Holly approves of her fancy eating station now. :)


I like the extra touch it adds. I love molding and am starting to add more and more of it around my home. 


adding molding to kitchen cabinets


It was hard to photograph close ups because it's white on white, but I think you can get the idea. :)


If you want to see how we painted our kitchen cabinets, you can click HERE and if you're interested in seeing how we replaced our backsplash with white subway tile, click HERE

Thanks for stopping by!

~Lisa

Monday, August 10, 2015

A Few Small Changes

How is everyone? We've been enjoying the last few weeks of summer, but boy is it hot! 

I've had a busy day...I mopped the wood floors, washed/changed sheets, did four loads of laundry, and started some BBQ chicken in the crock pot. I think all I have left now is to empty the dishwasher and get the corn on the cob ready to go with the chicken. I'm trying something new with the corn. I'm using a recipe from Tiffani Thiessen that has sriracha sauce, mayo, and a few other ingredients.  We're spreading it on the corn on the cob instead of butter. I'll let you know if it's a hit. :)

So I've been making some small changes around the house. I got the urge to simplify/declutter things. 

Let's start in the dining room...


I removed everything off the kidney table and only left the soup tureen on the buffet. 


It sure is a lot easier to dust now. :)


I like the more streamlined look. I know I'll change it up again, but for now I'm loving it. 


I removed the tray I had on the dining table and replaced it with this simple glass hurricane. 


The silver cake plate hopped off the kidney table and over to this corner piece. 


I think the only thing I changed on this round table was replacing the green boxwood ball with a candle on that little stand. 


On the kitchen table, I removed the hydrangeas from that basket. I just got tired of constantly rearranging them when Holly poked her head into there. :) Yep, she would jump up there and poke her nose around that basket. 


I love this basket. I bought two of them at Kohl's and with my coupon, they hardly cost a thing. 


I added our coasters inside the basket. After staining/painting our kitchen table, I want to make sure we preserve the top, so I've trained the boys to always use a coaster. 


In the guest bath, I removed the lamp and decorative plate. I like the cleaner look.


Above is the other burlap basket I got at Kohl's.


I guess that's about it. I did try removing a few things from my kitchen counters, but ended up putting them right back because we use them regularly. All it took was one time of having to go to the pantry to get something for me to put it back on the counter. #lazy

I'm getting ready to photograph a small change we made to our kitchen cabinets and will hopefully get that post up later this week. 

Y'all have a great day!

~Lisa 

Monday, August 3, 2015

My New Favorite Makeup For Summer Humidity

I don't know about you, but it's VERY humid where we live. We've been experiencing triple digit temps with humidity levels reaching 90% or more. 

Y'all know I have a predilection for Neutrogena products, and I still do, but with our extreme weather this summer, I was tempted to try something new. As I was watching TV the other day, (I think it was Sharknado, don't judge~lol!) there was a commercial for Loreal Infallible Pro-Matte 24 Hour Foundation. Hmm...this instantly grabbed my attention. A makeup that lasts 24 hours??? I've never worn my makeup that long, but still...that's a big claim they're making. The die was cast...I couldn't wait to try it out!

They also make an Infallible Pro-Matte 16 Hour Powder that I tried out. I figured it was best to try both products together. 

BTW, do ya'll know that Walgreens will let you return ANY makeup for ANY reason? Yep, you can bring it home, try it out, and if you don't like the shade, etc. you can return it. This is at ALL Walgreens stores too. (I have to give a shout out to Melissa at 320 Sycamore Blog for this great info.!) Oh, and Walgreens has this very makeup "buy one, get one 50% off" right now. Mine were $13.79 each, but with the sale it would only be around $20 for the foundation AND powder.  

So, obviously I bought mine at Walgreens. :) Here's a pic of the foundation...


And powder...


Here's the foundation brush I applied it with...


stipple brush for foundation


It's the Up & Up Complexion brush from Target. My sweet friend (and personal makeup advisor) Selene at Restoration Beauty recommended it on Instagram and as usual, she was spot on! I loved this brush more than words can say! I used it as a stippling brush when applying the Loreal foundation and it worked wonders!

I dotted the foundation on my face, one section at a time (forehead, cheeks, nose, chin) and used the brush to stipple it on. I didn't drag the brush over my skin or use it in a circular motion at all. I literally used it the same way I would stipple paint on a wall. :) It was hard for me to see how it would blend without using a circular motion, but somehow it did. You can google "using a stippling brush for foundation" and see all kinds of videos explaining how to do it.

Here's the other neat thing about this brush. This is what it looked like after I used it four times...


See? Not a trace of foundation remains on the brush! I love that I'm not wasting any foundation AND I don't have to wash this brush as often. :) 

The powder comes with a sponge and I applied it using a blotting motion. I just kind of pressed it into my skin.

I have to say, this makeup lived up to its hype. It almost seemed to have an airbrushed quality to it. The coverage was phenomenal and I wore it over 8 hours before I felt the need to blot a little more powder in my T-Zone. 

I wore it for about 10 hours total and it really did look just as good at six o'clock at night as it did at eight o'clock in the morning, and that's really saying something when you factor in our heat and humidity. :)

So this makeup gets a big thumbs up from me. I can see it quickly becoming my "summer makeup" or any other time I want my makeup to last extra long. 

One more thing...I shared this pic on Instagram last week...


Looks inviting, huh? Well, let me tell you...this was taken on our recent trip to the beach and it was so hot, we saw people being taken by stretcher because of heat exhaustion. The beach is my least favorite place in the world. It's a shame that I live so close to the beach, but can't stand it. :) Don't get me wrong...I love listening to the waves crashing and I adore looking at pictures of the beach, but actually being there is another story. I can't stand the heat, humidity, sand, water, or roller coasters, but my boys love it all. I pretty much took up residence in a Starbucks until everyone was ready to go home. Lol!

I'm not much of an outdoorsy girl here in the Texas heat, but when we're in California, I'm outside all day long. There's nothing quite like that awesome Cali weather. :) 

Y'all have a good day and let me know if you try this makeup. It's one of my new favorite things. 

~Lisa


Related Posts Plugin for WordPress, Blogger...